[Editor’s Note: Be sure to click on the images to enlarge them, especially if you plan to try this at home.]
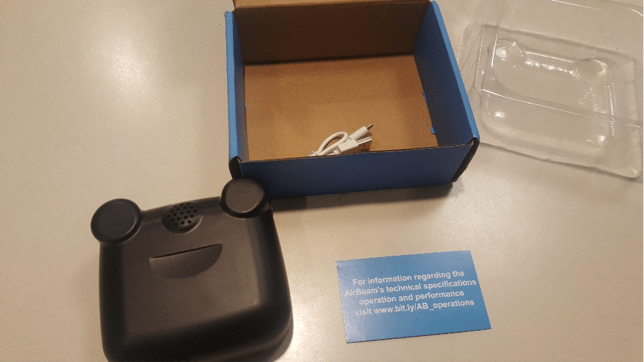
Before I conducted my pollution study around the city of Birmingham, I needed to test the AirBeam itself. The AirBeam is a portable air monitor that is used to collect pollutant particles. You can purchase an AirBeam at http://www.takingspace.org/aircasting/airbeam/. Once I saw the small box the AirBeam came in, I got really excited. Surely, this will be an easy setup and execution…right? Thankfully, after 15365733 some mistakes, I was finally able to get the setup and execution right. I hope this rundown will prevent you from wasting your time, and make your use of the AirBeam an easy and carefree process.
First of all, the box the AirBeam came in was really small. Unfortunately, that meant that there was no instructor’s manual. The manufacturing company, thankfully, did in fact leave a blue card in the box. Displayed on the card was a link to an online website that had more information on how to use the AirBeam.
The website which is found on the card is www.takingspace.org, which is the same website that was used to purchase the AirBeam. It was really helpful in understanding the different parts of the AirBeam. It also introduced me to the app AirCasting, which is used to map all of the data collected from the AirBeam. An important thing to note is AirCasting is currently only available to Android users. The website didn’t really explain how to connect to AirCasting, except that AirBeam and AirCasting are connected via Bluetooth. After many tries and Youtube videos, I was finally able to figure it out.
First, you need to download the AirCasting app from the Play store on your phone. It’s free so don’t worry!

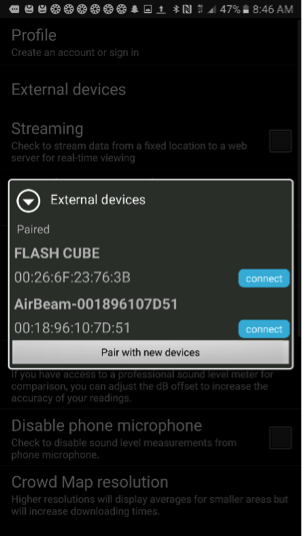
Then, you should turn on your phone’s Bluetooth. A device with the name “AirBeam” should appear. Make sure to pair the AirBeam with your phone until it becomes part of the paired devices. I noticed that the first couple of times I connected my phone to the AirBeam, a passcode popped up on the screen. Write the passcode on a piece of paper, because you will need that later on. It’s also important to note that the passcode changes with each connection. So if a disconnection occurs with the Bluetooth, you need to write down the new passcode. After using the AirBeam a couple of times, I noticed that a passcode stopped appearing. That might occur to you too and that’s okay! It just means that the AirBeam stayed as a paired device, and so no passcode is needed.
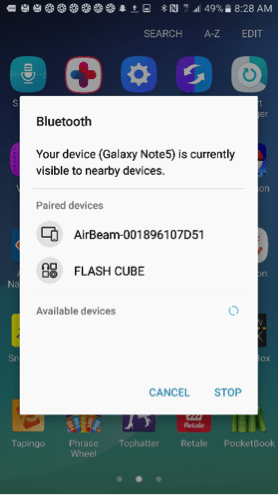
By the way, please disregard the words “FlashCube” in the picture above. It is another device that I have connected to my phone. It is irrelevant to the AirBeam.
Open the AirCasting app and hold onto your phone’s back button for a couple of seconds and this should appear:
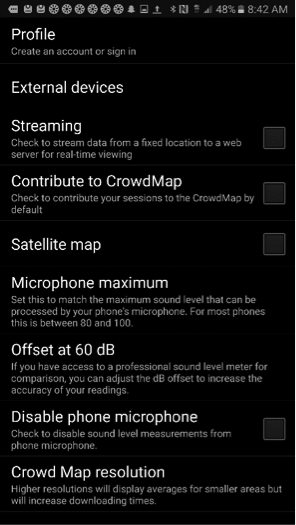
Click on “Settings” Then click on “Profile” at the very top to create an account. It is important to create an account, because it will help organize your data and the account name is what will appear on the AirCasting map.
After making the account click on “External Devices”, and click on “Connect” next to the word AirBeam. At this point, a popup asking for the passcode will appear. Put the passcode in and it should connect.
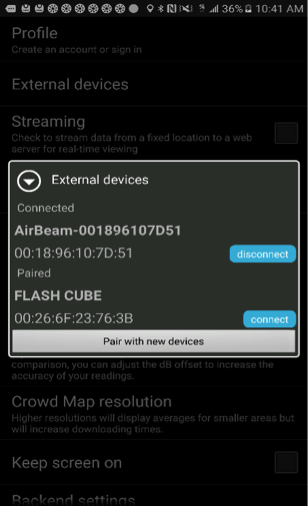
You will be correctly connected if this appears:
After that click on your phone’s back button to go back to the main page of the app.
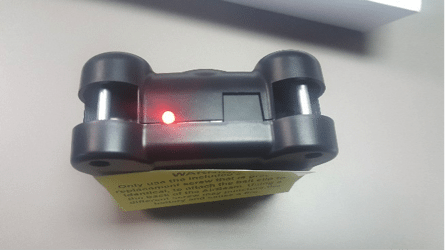
Now is the time to use the AirBeam. Turn on the AirBeam. The dark red bulb should now display a light red light. If the AirBeam is connected correctly to the AirCasting app, the light will blink a couple of times, then become solid red like in the picture below. From time to time, the light might blink again and that is also fine. Be careful, because if the light is blinking consecutively, then that means the AirBeam is not connected to the app properly, and you need to repeat the above steps again.
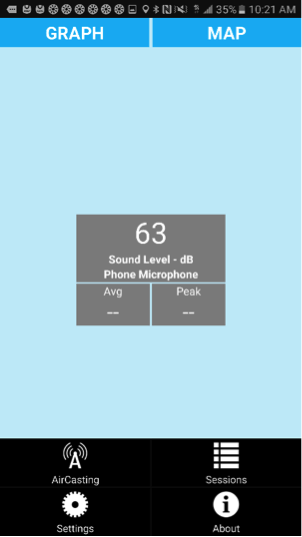
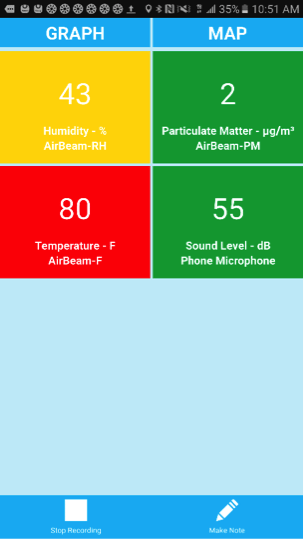
Go back to the AirCasting app and click on “Start Recording.” This should appear:
It will sometimes switch to this:
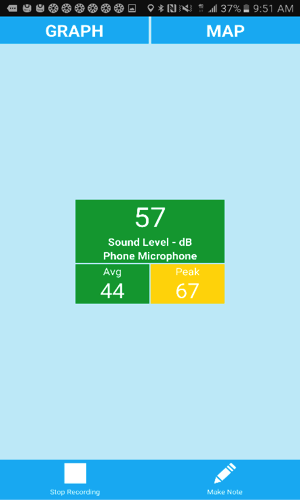
If it switches to the above picture, then that means that the AirBeam is only collecting the decibel reading of the sound travelling around you. If your goal is to collect air pollution, like mine is, then it is imperative that the AirBeam is collecting the particulate matter readings. You should restart your recording, until you see the four colored blocks appear.
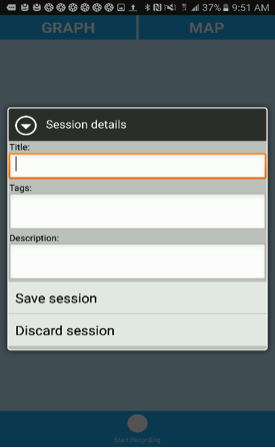
Click on “Stop Recording” whenever you have finished collecting the data. AirCasting will ask you to input the session details.
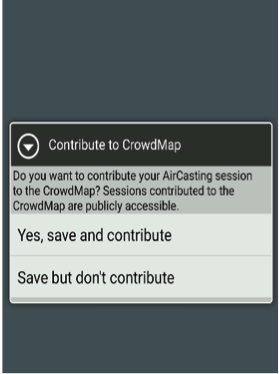
You will then be asked if you want to contribute to CrowdMap. Click: “Yes, save and contribute.”
To access CrowdMap to see if your data was collected go back to www.takingspace.org and click on “Maps” in the upper left corner.
After clicking on “Maps”, a map similar to this should appear:
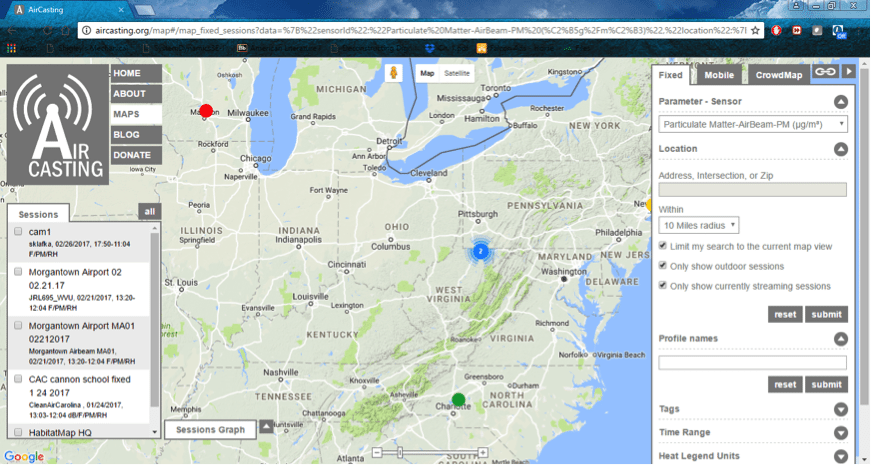
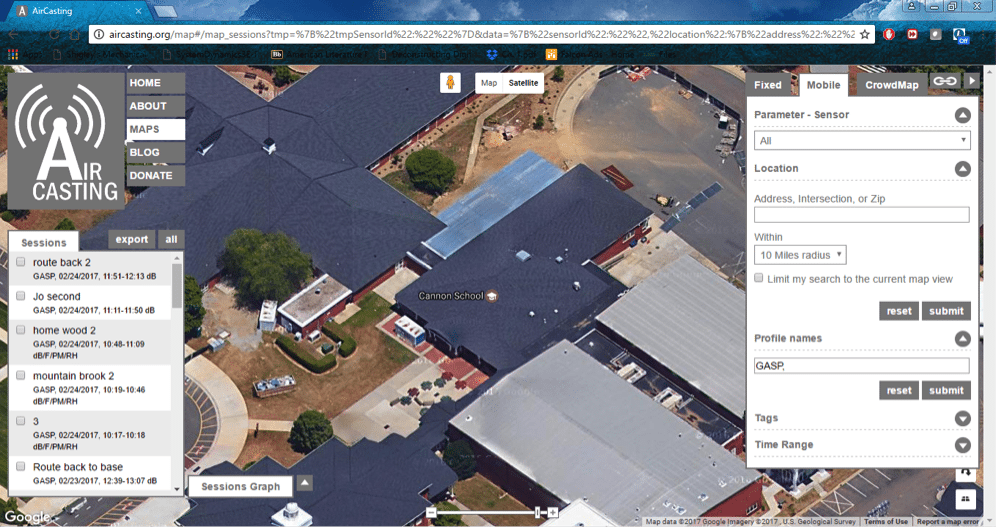
Click on “Mobile” in the upper right corner. Search for your results by putting your profile name under “Profile names.” Then click on the “Submit” button. You might need to click the “Submit” button a couple of times, until the “Sessions” section at the left of the page starts to display your results.
Click on any one of the data points you collected under “Sessions” and you will have something like this appear:

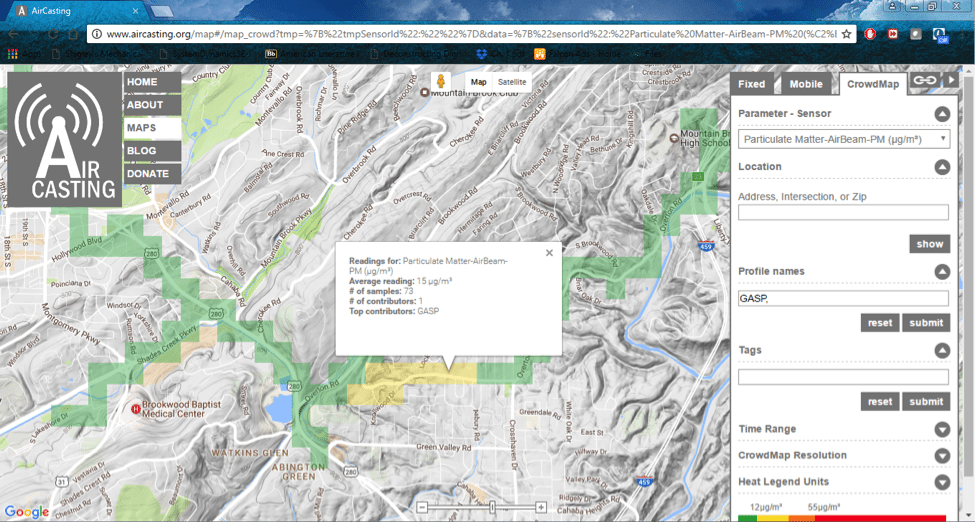
My favorite part of AirCasting is the CrowdMap. Click on “CrowdMap” in the upper right corner. Search for your results by putting your profile name under “Profile names.” Then click on the “Submit” button. You might need to click the “Submit” button a couple of times until the “Sessions” section at the left of the page starts to display your results. You might also need to wait while the map is being loaded.
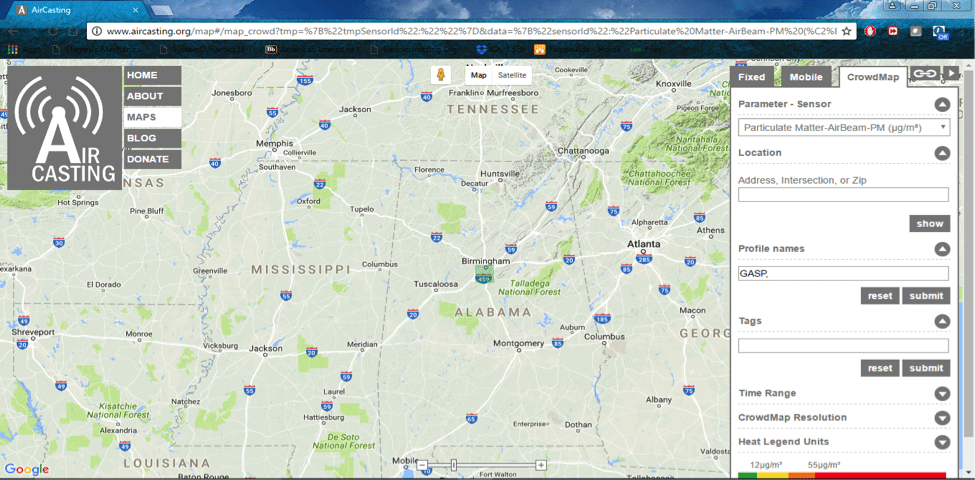
The colored squares on the map are your results. Zoom in by clicking on the plus sign at the bottom of the page. This will really help you follow the path you took during data collection, and actually show you more readings. The more you zoom in, the more squares appear unless you collected data at only one point.
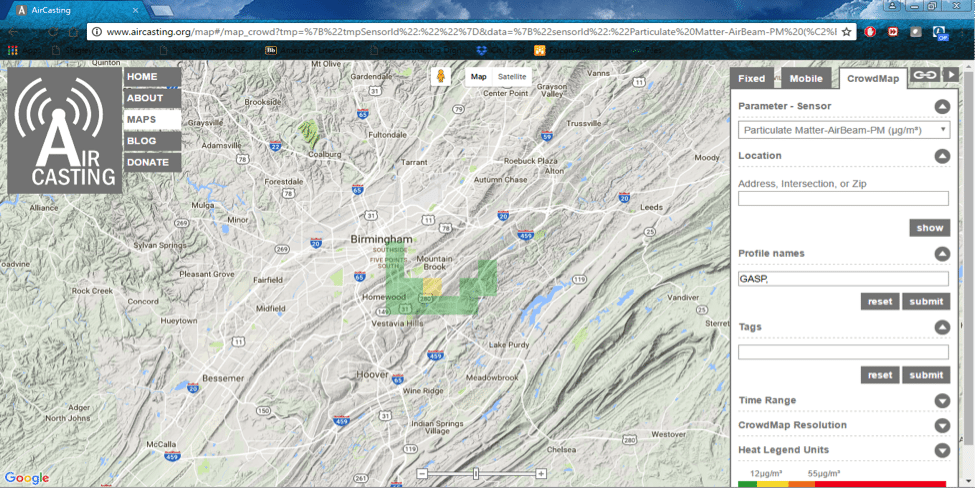
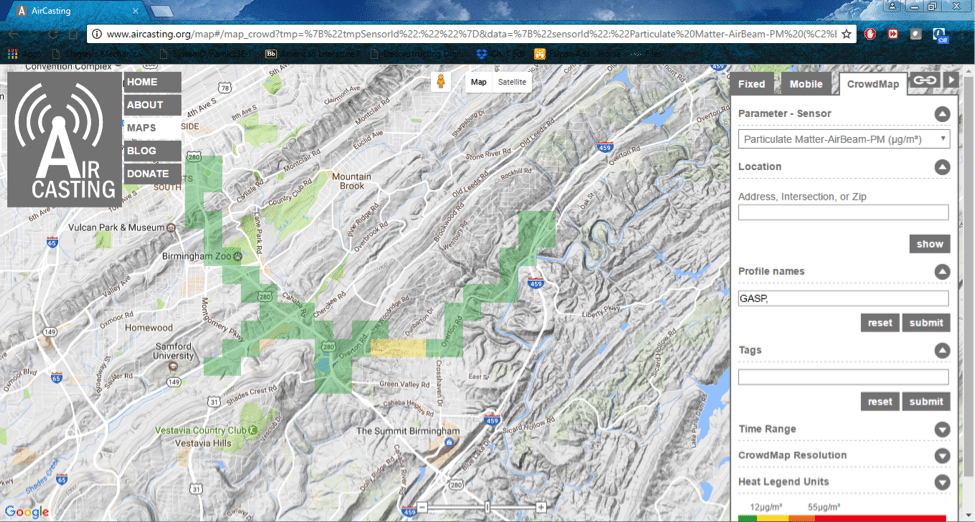
Clicking on different points of the data squares will show the average reading value taken at that point.

Make sure to check back here next week, because I will show you how to connect the AirBeam to your car. I will also share my results with you. If you have any questions or issues, leave a comment below or email me at [email protected].